When assessing robotic solutions such as automated guided vehicles, automated forklifts and mobile robots, a common question from potential buyers is, how will these solutions be installed at my site?
It pays to understand this installation (or ‘commissioning’) process. Once you fully understand it, you can both educate colleagues and decision makers about how automated vehicles would roll out, and ensure that interruptions to your operation are kept to a minimum.
The impact of navigation technology
Exactly how an automated vehicle is installed depends on the type of AGV navigation system it uses. For example, some more traditional systems follow physical lines on the floor, which will mean laying magnetic tape around your site. By contrast, so-called ‘laser guided vehicles’, which use laser triangulation to calculate their position, require numerous reflective targets to be professionally installed.
In the case of vehicles driven by natural navigation, such as ANT natural navigation by BlueBotics, the process is simple. The installation of ANT driven vehicles requires minimal changes to your site’s infrastructure – at most, reflective stickers at a few locations.
Watch the video guide:
Here are the five key steps involved when installing AGVs/AMRs that are driven by ANT:
Step 1 – Calibrate your AGV/AMR
When your ANT driven vehicle arrives on-site, the first job is to ensure that its ANT navigation system properly understands the specific parameters of your vehicle.
This is crucial as a vehicle’s components, such as its LiDAR laser scanners, can be easily nudged out of alignment during transportation. A solid calibration process will help avoid issues later on, as imperfectly calibrated vehicles may not navigate accurately (and the reason for this might otherwise not be clear, leading to frustrating troubleshooting).
The calibration of your ANT driven vehicle will be handled by your vehicle’s integrator (usually the vehicle producer or a systems integrator) using BlueBotics’ ANT lab configuration software. The process is simple, comprising two key steps:
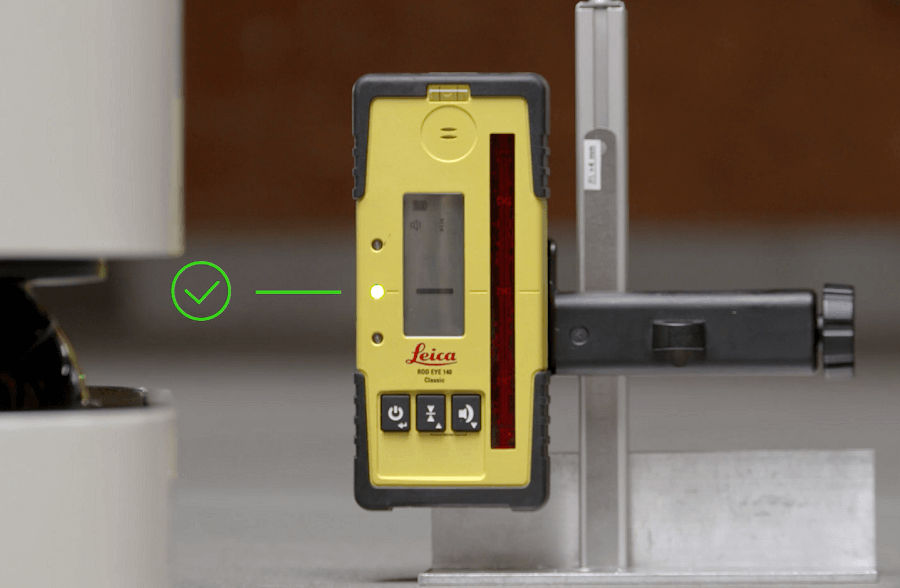
- Manual adjustment of the laser plane of your vehicle’s laser scanners. This is necessary because ANT navigation needs all of your vehicle's laser scanners to sweep the environment on the same horizontal plane in order for them to see features consistently.
- Automatic calibration of your vehicle’s geometry using ANT lab’s built-in Configuration Wizard. This process involves driving your vehicle around pre-defined patterns (such as spirals) in the space where it will operate. The data ANT lab collects during these movements allow it to calculate small corrections that it will apply to optimize your vehicle's positioning accuracy (crucial to its precise operation).
Calibration typically takes 15 minutes per vehicle. In future, a vehicle will only ever need recalibrating if there has been a mechanical change, such as wheel being replaced.
Step 2 – Create your site map
Once your vehicle has been calibrated, your integrator will create the map of your site that your vehicle will use to get around.
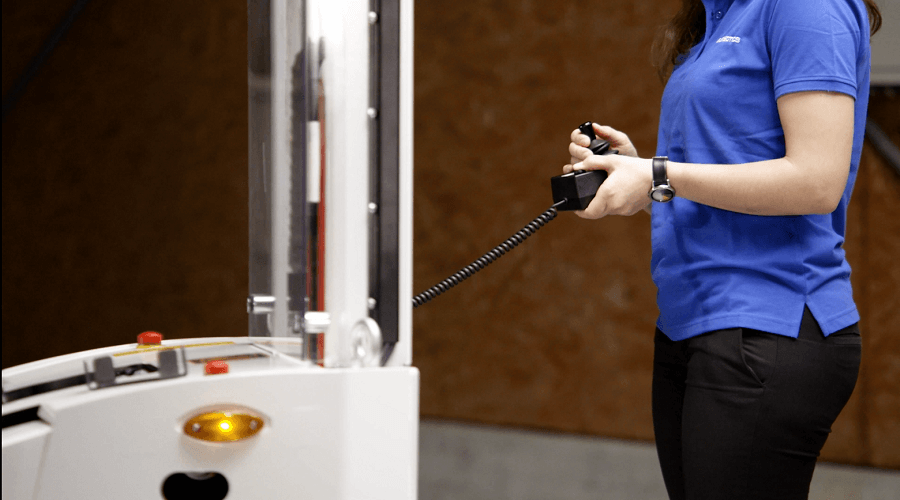
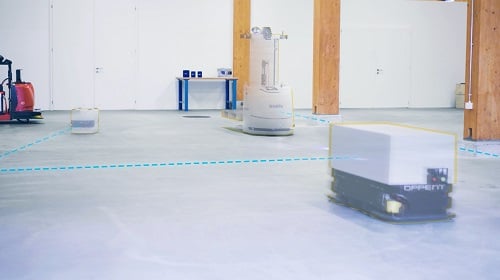
This map is created by manually driving your automated vehicle around the area in which it will operate. In the case of an automated forklift, this will mean driving this hybrid vehicle as normal, using its steering wheel. But in the case of a forked AGV or AMR (without a manual drive option), the robot will be controlled using a wired joystick.
As the vehicle moves around your site, data from its LiDAR laser scanners — effectively everything that these components ‘see’ during the drive — is recorded. This data is then imported into ANT lab and transformed into a raw site map. We say raw, since the map will contain not only your site’s walls and permanent features, but also any temporary objects that are seen by the scanners, such as pallets, people, other vehicles and so on.
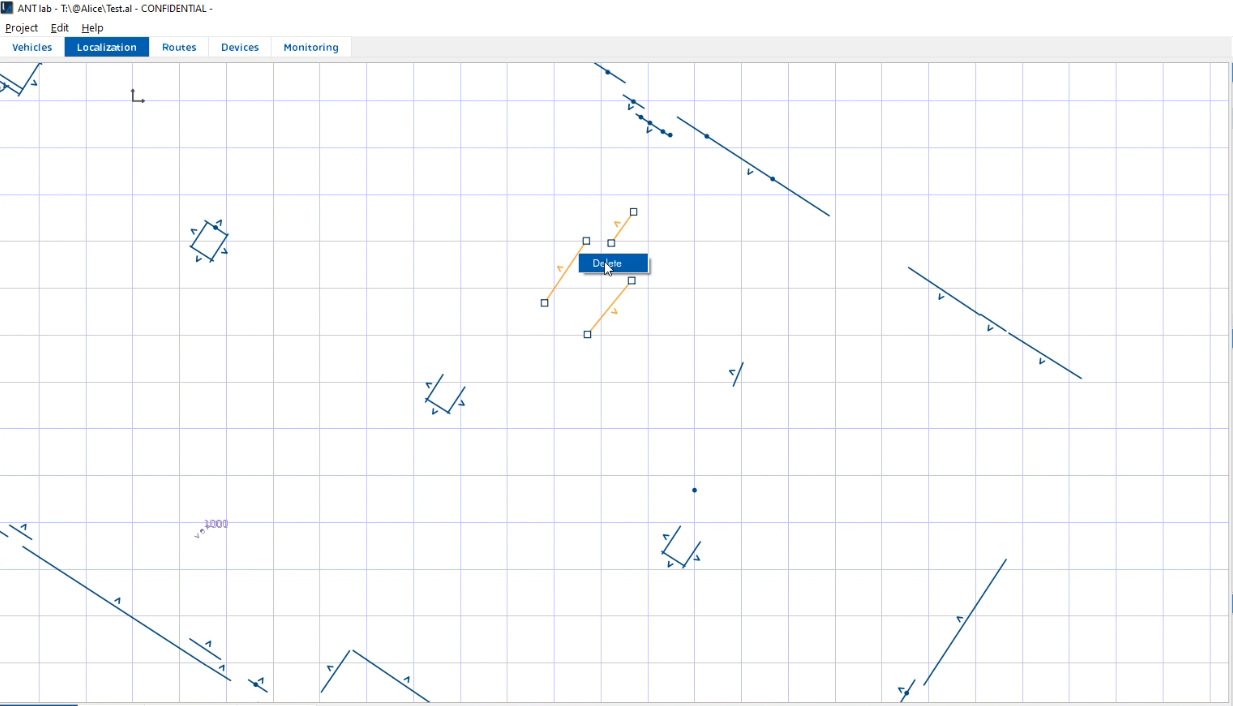
Step 3 – Clean your site map
Next, your integrator will “clean” the site map - deleting temporary objects and features such as people, pallets and other vehicles, but keeping permanent, static site features such as walls, pillars, and machinery.
These permanent ‘natural features’ will be used as references by your vehicle’s ANT navigation system, while temporary objects will simply be ignored.
By ‘matching’ the permanent features that your vehicle’s scanners ‘see’ with those saved in the map, ANT is able to accurately calculate your vehicle’s position. This precise positioning is key to effective autonomous navigation.
This approach ensures that the map, and your vehicle’s operation, remain reliably accurate over time.
And if a temporary object obstructs your vehicle’s path? You have a choice. It can be programmed to either stop and wait for the blockage to be removed, usually the case with larger AGVs (making staff training important), or it can navigate dynamically around the object, which is more often the choice for smaller, agile AMRs.
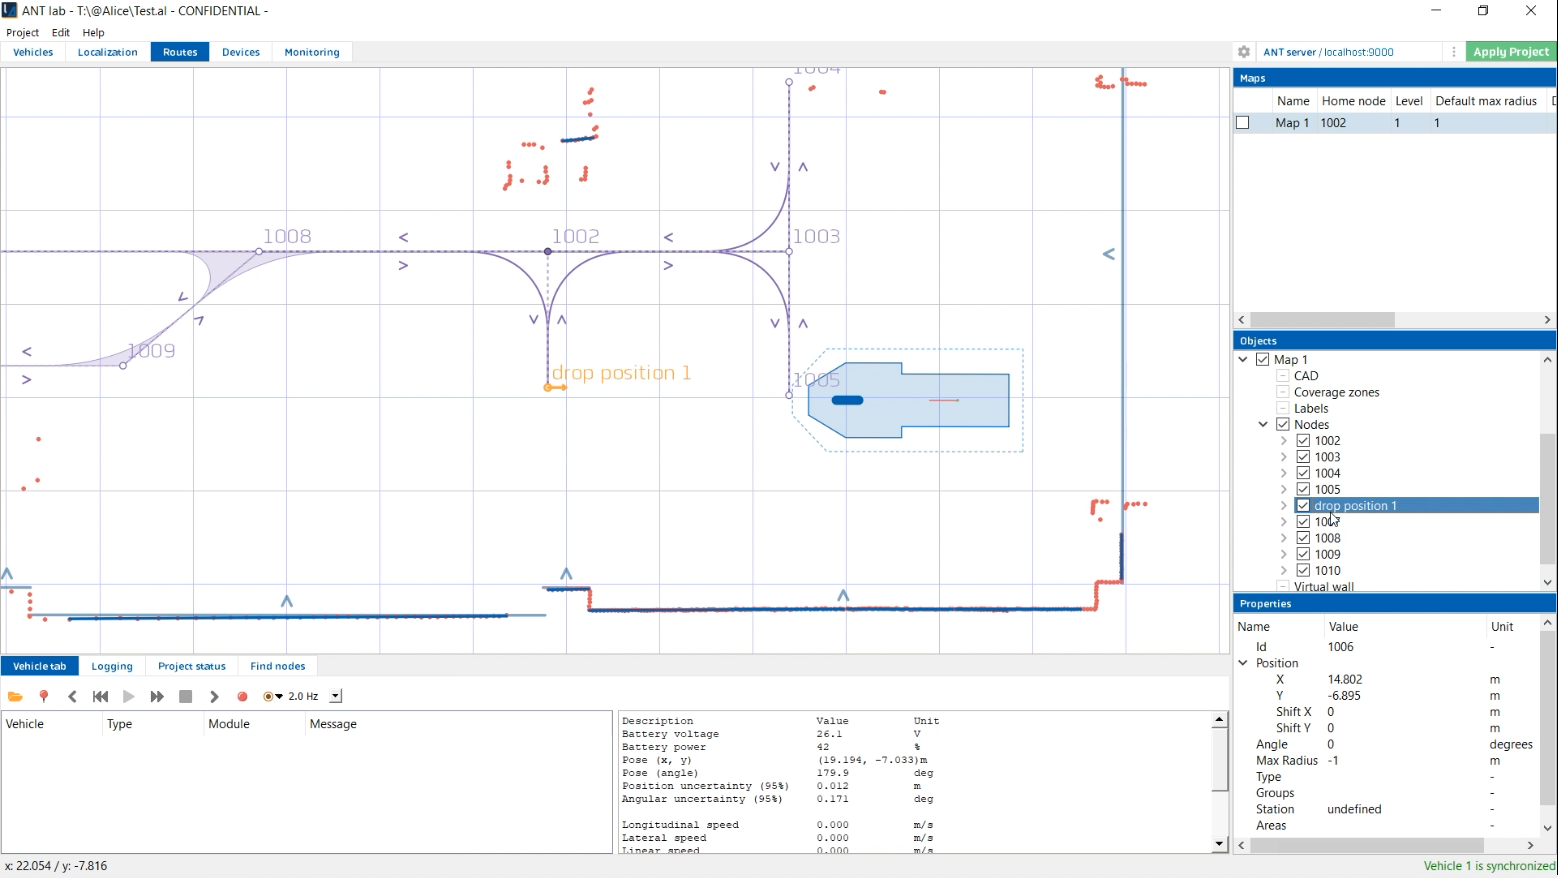
Step 4 – Create your vehicle’s routes
Now that your ANT driven vehicle has a map to drive around, your integrator can program its routes — the virtual paths it will follow around your site — using the same ANT lab software.
Programming routes is easy with ANT lab. First, we create ‘nodes’, then we join these together with ‘links’.
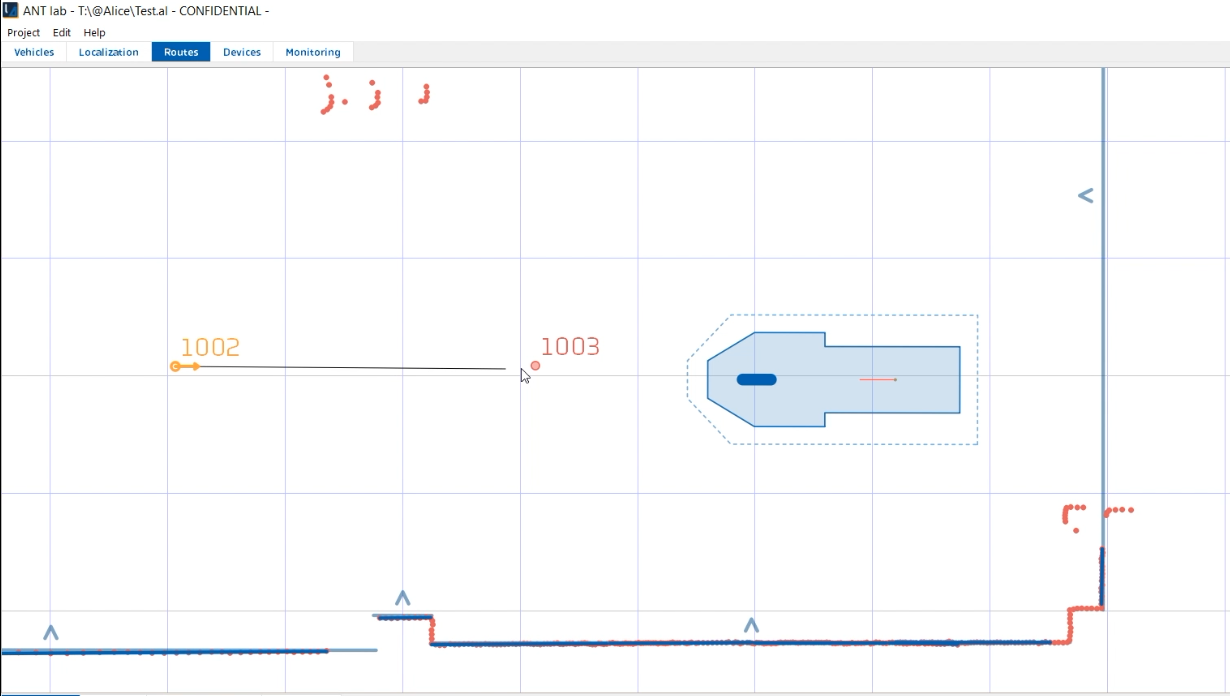
A link itself can be set as either unidirectional (meaning a vehicle can travel along this section of route in only one direction) or bidirectional (either direction is possible). Simple.
Step 5 – Create your vehicle’s actions
- Change a vehicle’s behavior (e.g. slow down).
- Activate a vehicle’s sub-systems (e.g. lower or raise its forks).
- Enable the vehicle to interface with on-site machinery, such as automatic doors, elevators, and conveyors.
- Any number of custom actions can also be programmed.
Simulate for success
One of the best ways to ensure a seamless AGV/AMR installation is to program and then simulate your project in advance.
To do this, your vehicle integrator will typically employ CAD software to create a simple ‘digital twin’ of your site. This can be extracted from your building’s plans.
Their team will then create the virtual routes and actions that you have agreed on during your planning discussions, before running ‘virtual vehicles’ through the simulation. In the case of ANT driven vehicles, this means using ANT lab configuration software to program the project (creating the map, routes, and actions), then using ANT server fleet manager to run and visualize the simulation.
This approach is great for identifying and untangling issues ahead of time. Plus, it can help you and your integrator to agree how many automated vehicles you will need to invest in: too few and your required tasks might not be completed efficiently; too many and your vehicles might end up sitting around waiting for missions.
All in all, a solid and well thought out simulation can significantly shorten your vehicle’s installation time and help you optimize your investment.
Get your automation program rolling
Now that you understand the basics of how ANT driven vehicles are installed, or commissioned, why not start exploring which ANT driven vehicles are available on the market, using this site’s Vehicle Finder?
Alternatively, if you have more questions, feel free to contact our team.

